Table of Contents
Audio Recording
Record audio alongside video footage from cameras with built-in microphones or external audio inputs.
Overview
Many IP cameras don't support audio recording - check your camera's specifications before proceeding. Cameras that do support audio typically have a built-in microphone integrated into the camera body. Some cameras may also have an audio input jack for external microphones.
TetherX can record audio from either source, provided the camera's stream includes audio.
Warning: Audio recording may have legal implications depending on your jurisdiction. Ensure you have appropriate consent and signage where required.
Enabling Audio on the Camera
Audio must first be enabled in your camera's settings. The exact steps vary by manufacturer.
Hikvision Example
Open your camera's web interface directly or via tunnel
Navigate to Configuration → Video / Audio
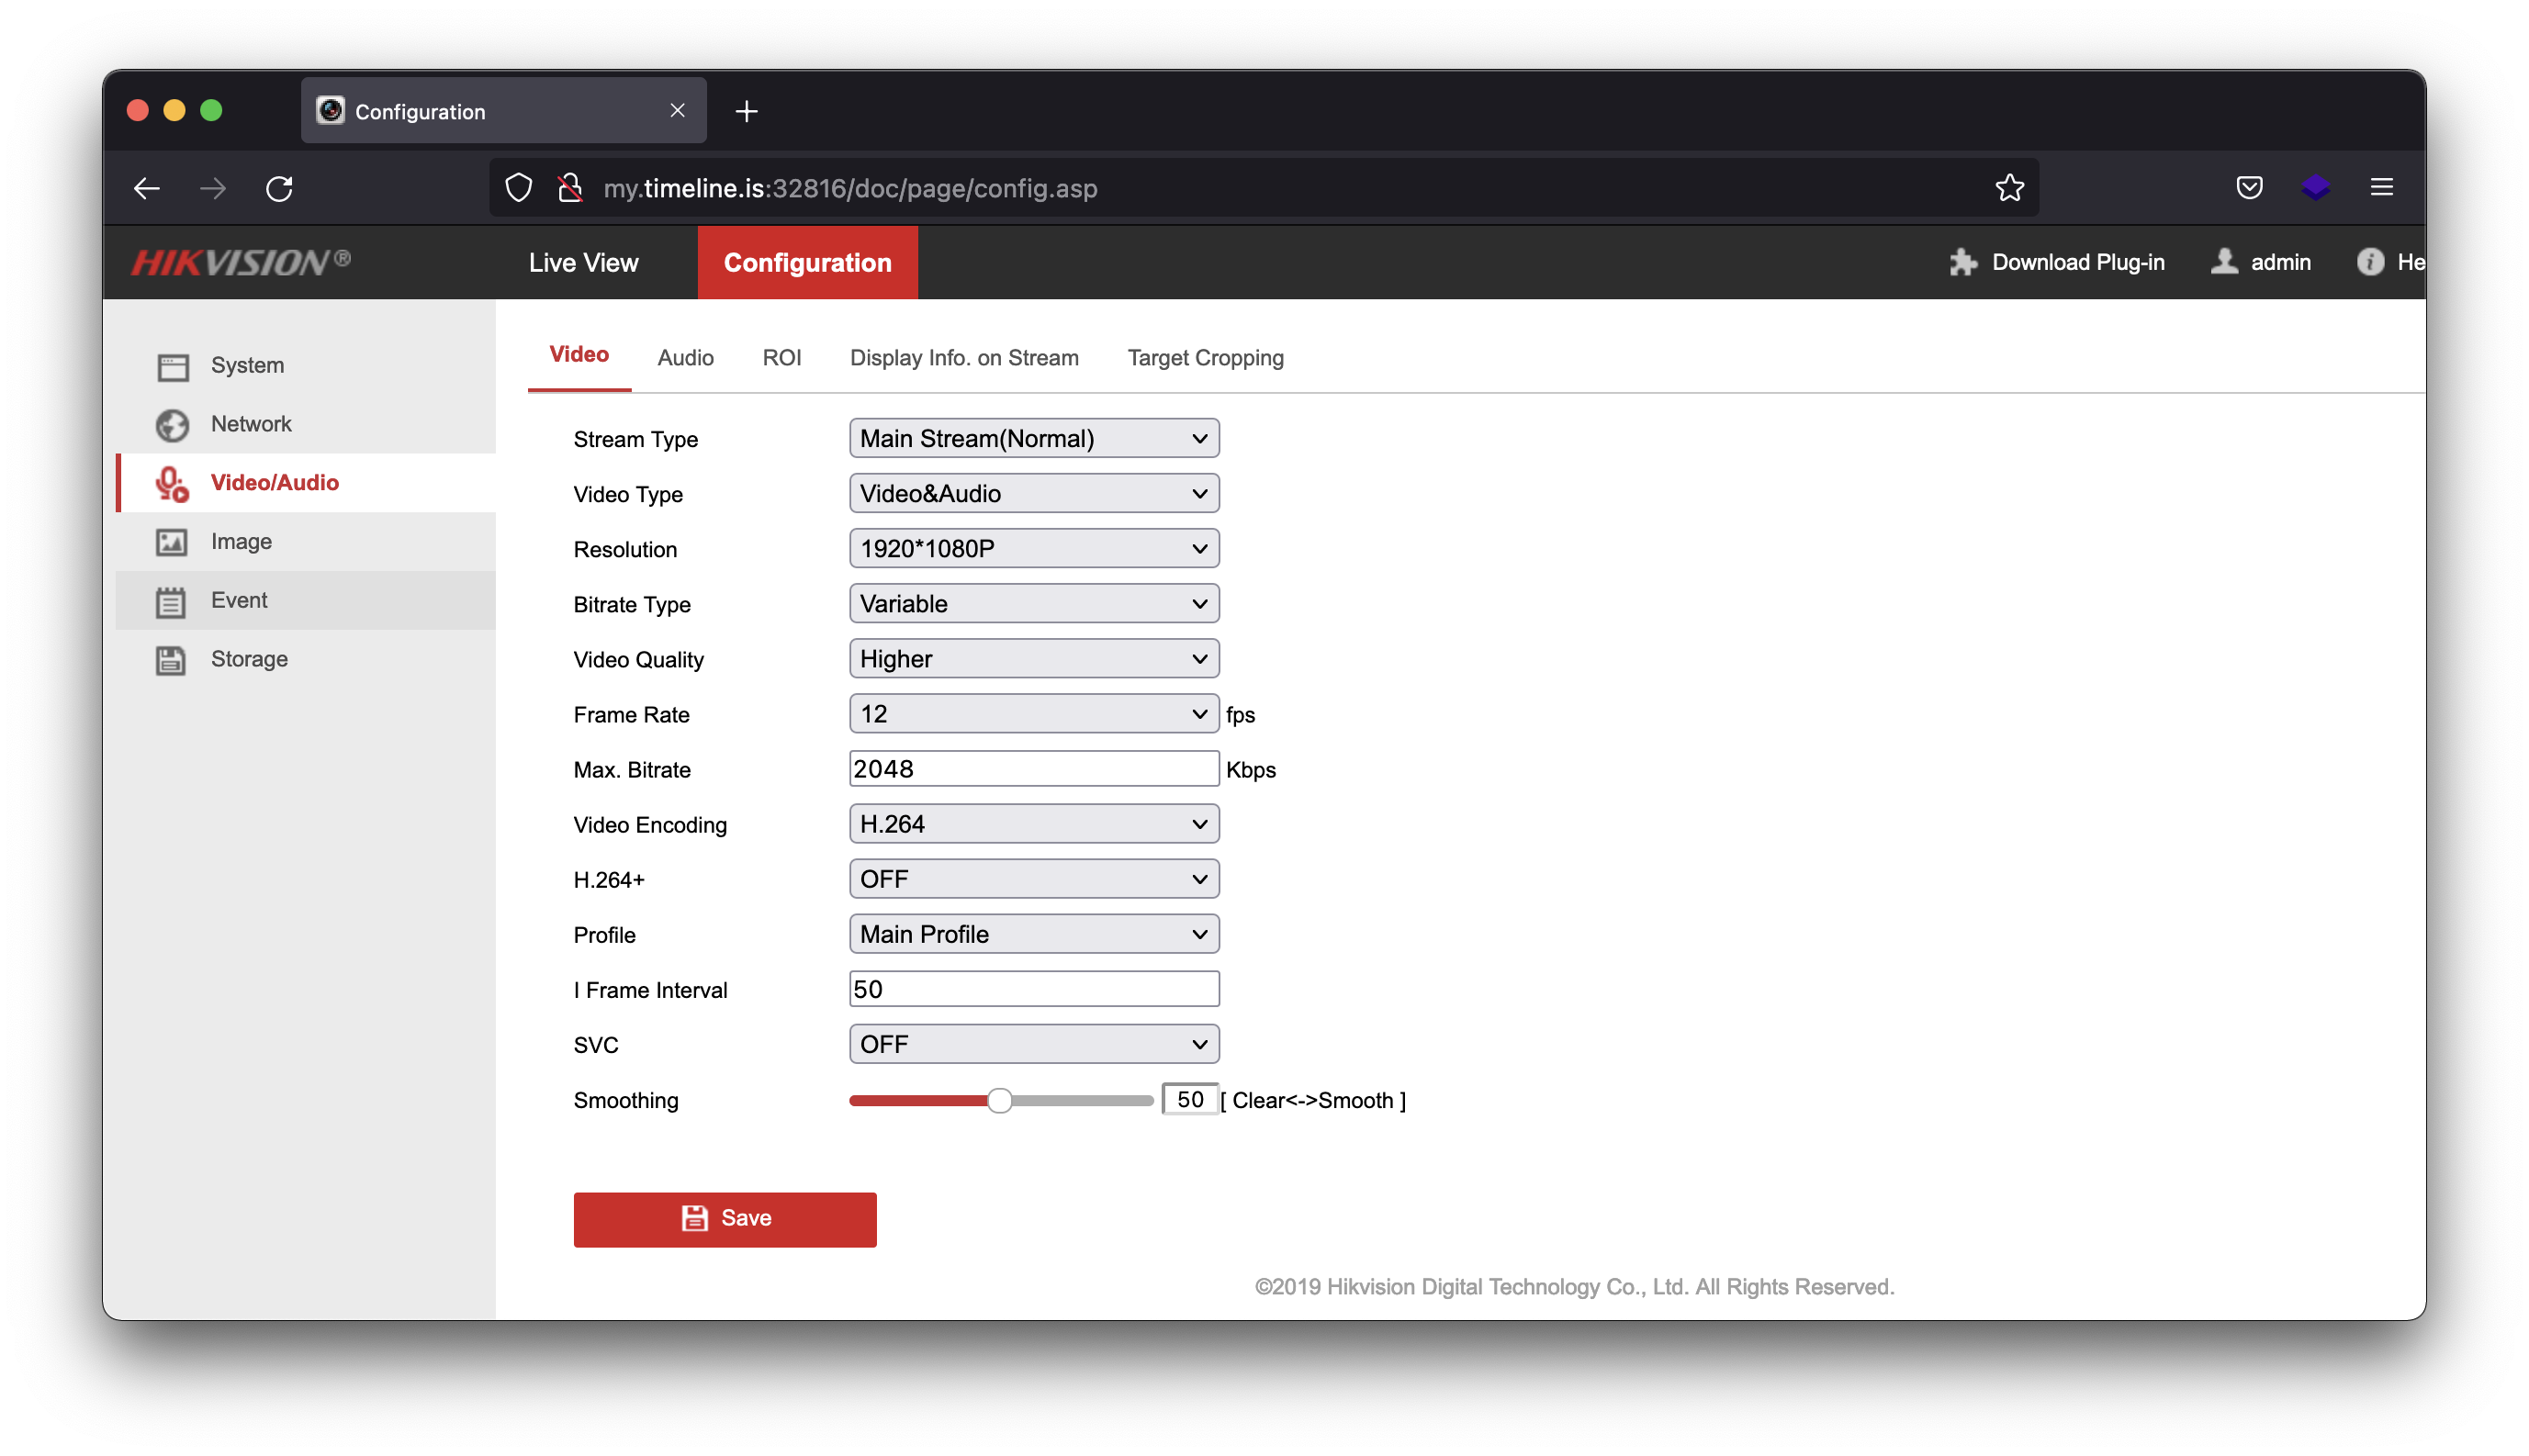
- Find the Video Type dropdown and change it from Video Stream to Video & Audio
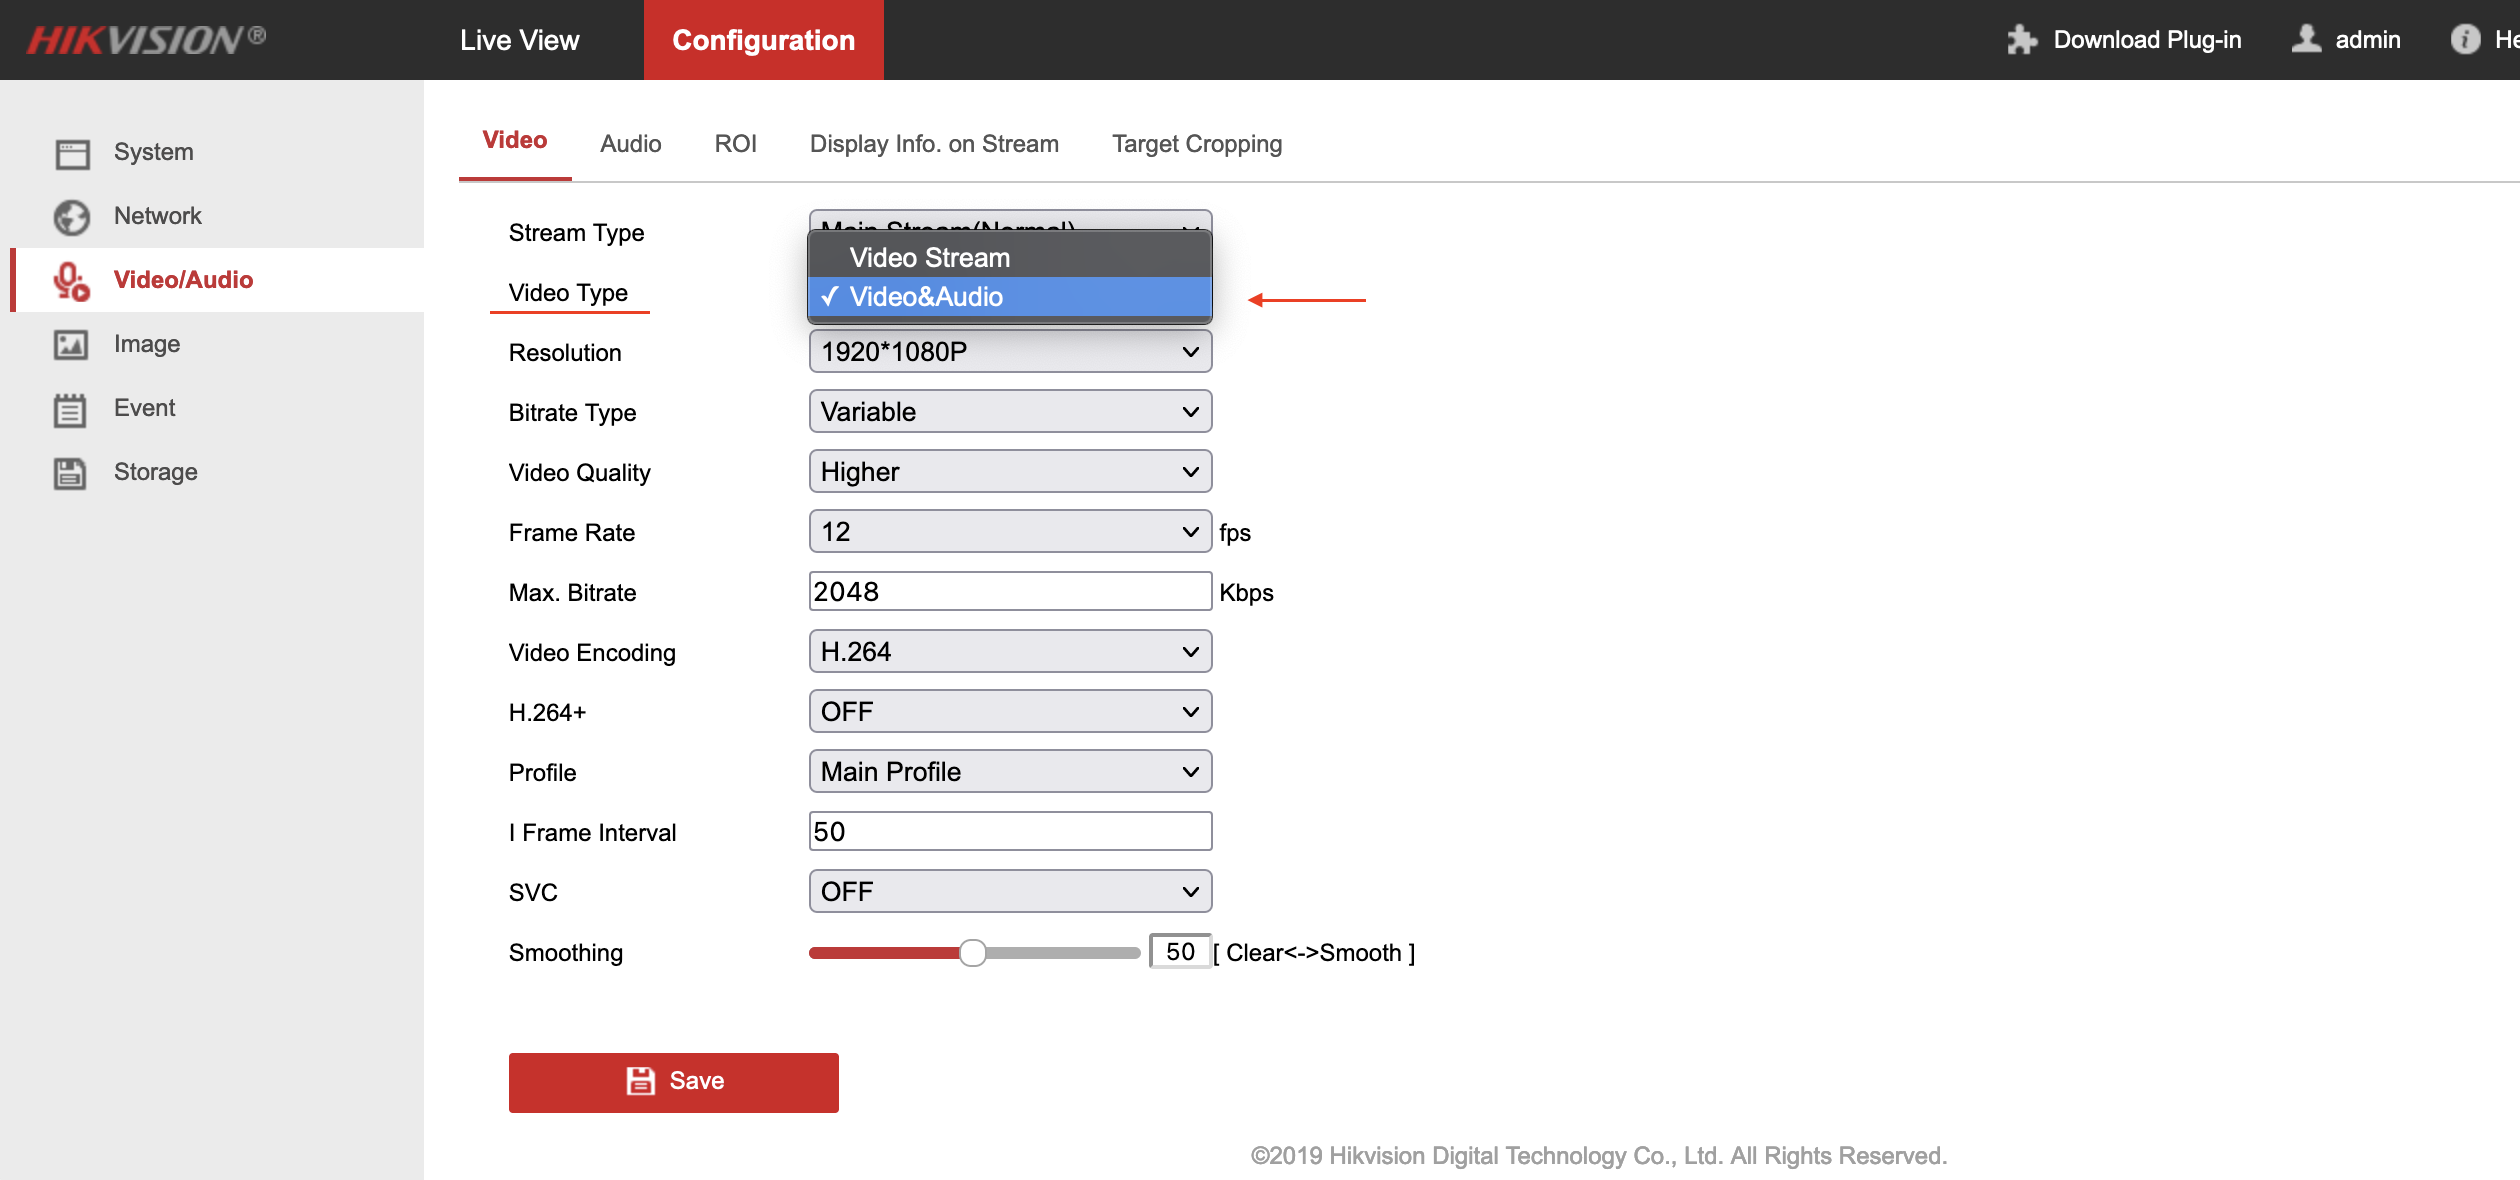
- Click Save

Tip: The exact menu location varies by manufacturer. Look for Video/Audio, Stream Settings, or Encoding Settings.
Other Manufacturers
| Manufacturer | Typical Location |
|---|---|
| Dahua | Configuration → Video → Video |
| Axis | Video → Stream → Audio |
| Hanwha | Video & Audio → Audio setup |
| Uniview | Configuration → Media → Audio |
Refer to your camera manufacturer's documentation for specific instructions.
Audio Encoding Settings
Once audio is enabled on the camera, configure these settings for optimal quality:
| Setting | Recommended Value |
|---|---|
| Sampling Rate | 44.1 kHz (or highest available) |
| Codec | AAC (preferred), WAV/PCM, or G.711A as fallback |
Codec priority:
- AAC - Best quality and compression
- WAV/PCM - Good quality, larger file size
- G.711A (A-law/PCMA) - Fallback only if others unavailable
Enable audio on both the main stream (recording) and sub stream (analytics) if you want audio in both recordings and live view.
Disabling Audio in TetherX
If your camera has audio enabled but you don't want TetherX to record it, you can disable audio recording without changing the camera settings:
Scroll to the Advanced Settings section
Find Audio Device and change it from Auto to None
| Audio Device Setting | Behaviour |
|---|---|
| Auto | Records audio from IP camera if available |
| None | Ignores audio stream - no audio recorded even if enabled on camera |
| Onboard | Records from the TetherBox's blue audio input jack |
Tip: Use None when you need audio for local monitoring but don't want it stored in recordings, or when audio recording isn't permitted at your location.
Troubleshooting
No audio in recordings:
- Verify audio is enabled on the camera (Video & Audio, not just Video Stream)
- Check the Audio Device setting in TetherX isn't set to None
- Ensure audio is enabled on both main and sub streams
Audio quality is poor:
- Increase the sampling rate in camera settings
- Switch to AAC codec if available
- Check the microphone isn't obstructed or damaged
Audio out of sync with video:
- This is usually a camera firmware issue - update to the latest firmware
- Try switching audio codec (some codecs sync better than others)
Legal Considerations
Audio recording regulations vary significantly by country and region:
- UK - Generally permitted in public/business areas with appropriate signage
- EU - GDPR applies; consent and clear signage typically required
- US - Varies by state; some require all-party consent
Always consult local regulations and legal advice before enabling audio recording. Display clear signage informing people that audio recording is in use.
Referenced in: